From a piece of code from a Developer laptop to a fully automated deployment, it takes only one step. When does your Team create its first automated builds? Let’s have a look, shall we?
1. Concepts
Before jumping into the main topic of this conversation, let’s have a look at several concepts for moving the code from a laptop into a production environment.
What is CICD pipeline, or Continuous Integration/Continuous Deployment? The pipeline is the spinal column of the modern DevOps environment, it links the gap between development and operations Teams by automating the building, testing and deployment of artifacts and applications.
Before continuing onto the CI/CD Pipeline, let’s have an overview what is DevOps:
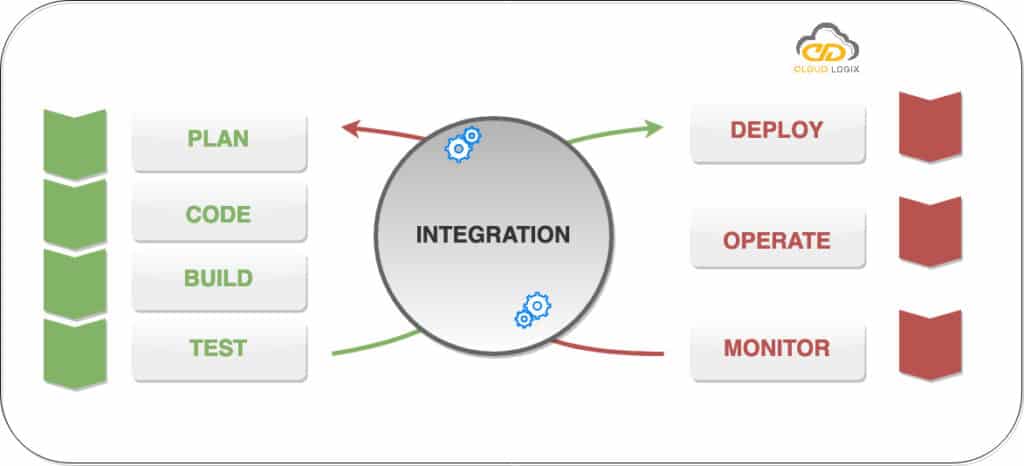
DevOps is the involvement of continuous development, continuous testing, continuous integration, continuous deployment and continuous monitoring of the applications / software throughout its development lifecycle. This process has been adopted by all the main and top companies to develop and deploy high quality applications and shorter development lifecycles.
Finally, your understanding of DevOps is not complete without learning about its lifecycle. let’s have a look and discover how it’s related to the software development stages:

Regarding the term CI/CD Pipeline, CI stands for Continuous Integration and CD stands for Continuous Delivery/Continuous Deployment. You can think of it as a process close to a software development lifecycle.
2. A look into the past (early 2010s)
Now we saw the concept, let’s take a look at the past, how it used to be when you wanted to build your first automated build. In my own and past experience back in 2013, I recall some engineers telling me that they used to bring a USB stick from server to server to deploy the source code produced by developers! It’s less than 10 years ago and it’s amazing to see how far we have come from.
Let’s have a look of the requirements from the past and let’s start with our version control tools:
- Perforce server
- Subversion server
- Git server
In the past, these 3 candidates were the most used solution, you had to have a server available (or a virtual machine on a hypervisor). Install, maintain and troubleshoot these softwares when they are crashing, or managing virtual machines disk spaces etc. Quite a piece of work to start with! SaaS companies such as GitHub or GitLab started to offer their services during that time, but compliance requirements were sometimes not meeting minimum standards, specifically for financial companies.
Let’s continue with Continuous Integration / Continuous Delivery tools:
- Jenkins servers (Master(s) servers / Workers)
- Bamboo servers (Master(s) servers / Workers)
As you can see, before setting our first automated build, the requirements were already quite high in terms of resources, servers and team of engineers looking after them. Automation Servers / Pipelines were becoming a crucial part of the business as a whole, making sure the latest features would be applied as soon as possible to an application. Failures were frequent: workers losing contact with the master server, disk full or tools unavailable as “someone forgot to add it during bootstrapping procedure”.
Following all of these pain points, companies adapted and proposed SaaS solutions to remove these blockers.
3. A look at today (early 2020s)
Today, pushing, testing and deploying codes has never been as easy as it is. Many solutions exist now online but let’s have a look at the two main players for managing source control on your behalf:
These two main companies radically change and they adapt rapidly to respond to the growing competitions of Continuous Integration companies such as:
This transition has a name and is now called: GitOps. We will review in future post what is GitOps and what it involves. In this review, we will just see a glimpse of this implementation.
Now let’s have a look on how you can automate your first build with these 2 main players.
Github
Github offers a set of tools to start automating in no time.
- Github Repository (Version Control)
- Github Action (Continuous Integration)
- Github Packages (Store your builds and container images)
Let’s setup a quick example (you can find the source code here), we will add a github workflows file in the .github/workflows/ path as follow:
name: Build and Test React Application

# Controls when the action will run.
on:
  # Triggers the workflow on push or pull request events but only for the main branch
  push:
    branches: [ main ]
  pull_request:
    branches: [ main ]

# A workflow run is made up of one or more jobs that can run sequentially or in parallel
jobs:
  build_test:
    # The type of runner that the job will run on
    runs-on: ubuntu-latest

    strategy:
      matrix:
        node-version: [10.x, 12.x, 14.x, 15.x]

    # Steps represent a sequence of tasks that will be executed as part of the job
    steps:
      # Checks-out your repository under $GITHUB_WORKSPACE, so your job can access it
      - uses: actions/checkout@v2
      - name: Use Node.js ${{ matrix.node-version }}
        uses: actions/setup-node@v2
        with:
          node-version: ${{ matrix.node-version }}
      - name: npm ci, build and test
        run: |
          npm ci
          npm run build --if-present
          npm test
A quick rundown of this code:
- Ubuntu container will be use for this CI testing
- We use this strategy block to specify node versions
- We specify node version through
${{ matrix.node-version }}and give it a name npm ciis similar tonpm installexcept that it can be used while testing, continuous integration and deployment.
Once you’re pushing on your main branch you should see the following happening:


As you can see, we realise our first part of our automated build which is Continuous Integration, let’s jump now on how we can store our packages / container images. Add the necessary Dockerfiles and a new workflow file to your repository as follow:
# This workflow uses actions that are not certified by GitHub.
# They are provided by a third-party and are governed by
# separate terms of service, privacy policy, and support
# documentation.

name: Create and publish a Docker image

on:
  push:
    branches: ['main']

env:
  REGISTRY: ghcr.io
  IMAGE_NAME: ${{ github.repository }}

jobs:
  build-and-push-image:
    runs-on: ubuntu-latest
    permissions:
      contents: read
      packages: write

    steps:
      - name: Checkout repository
        uses: actions/checkout@v2

      - name: Log in to the Container registry
        uses: docker/login-action@f054a8b539a109f9f41c372932f1ae047eff08c9
        with:
          registry: ${{ env.REGISTRY }}
          username: ${{ github.actor }}
          password: ${{ secrets.GITHUB_TOKEN }}

      - name: Extract metadata (tags, labels) for Docker
        id: meta
        uses: docker/metadata-action@98669ae865ea3cffbcbaa878cf57c20bbf1c6c38
        with:
          images: ${{ env.REGISTRY }}/${{ env.IMAGE_NAME }}

      - name: Build and push Docker image
        uses: docker/build-push-action@ad44023a93711e3deb337508980b4b5e9bcdc5dc
        with:
          context: .
          push: true
          tags: ${{ steps.meta.outputs.tags }}
          labels: ${{ steps.meta.outputs.labels }}
Basically, a new container will be built every time a change occurs on the main branch, you can see more information on this page. You should notice the following changes once you commit and push your code:


And voila! In a few minutes, you’ve automated and created a new container image based on your code. Let’s see Gitlab in action now.
Gitlab
Gitlab offers a set of tools for you to start automating your project.
- Gitlab Repository (Version Control)
- Gitlab CI/CD Pipeline (Continuous Integration)
- Gitlab Package and Container Registry (Store your builds and container images)
Let’s setup an example on Gitlab (you can find the source code here), we will add a .gitlab-ci.yml CI/CD pipeline file in Gitlab as follow:
build:
  stage: build
  image: node
  script:
    - echo "Start building App"
    - npm ci
    - npm run build --if-present
    - echo "Build successfully!"

test:
  stage: test
  image: node
  script:
    - echo "Testing App"
    - npm ci
    - npm test
    - echo "Test successfully!"
Quick explanation on the code above:
- 2 separates stages:
buildandtest - The first build part would make sure to install of packages defined in your
package-lock.jsonfile - The second part would run the
testpart to detect any issues in your code
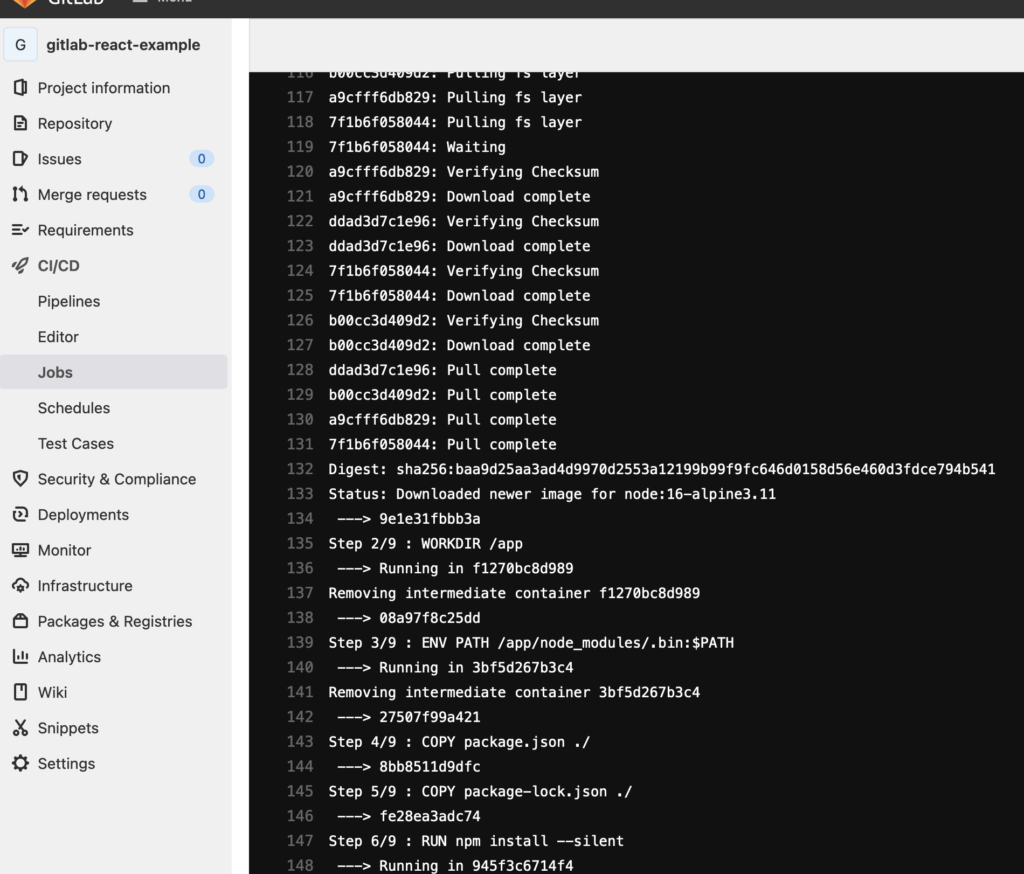
Once you’re pushing your code, a new CI pipeline will appear on Gitlab:

YYou can now notice that we successfully executed the part of Continuous Integration. Let’s now see how we can store our packages and for this, we will amend our existing .gitlab-ci.yml to look like this:
before_script:
  - docker login -u $CI_REGISTRY_USER -p $CI_REGISTRY_PASSWORD $CI_REGISTRY

build:
  stage: build
  image: node
  script:
    - echo "Start building App"
    - npm ci
    - npm run build --if-present
    - echo "Build successfully!"

test:
  stage: test
  image: node
  script:
    - echo "Testing App"
    - npm ci
    - npm test
    - echo "Test successfully!"

build:
  image: docker:19.03.12
  stage: build
  services:
    - docker:19.03.12-dind
  variables:
    IMAGE_TAG: $CI_REGISTRY_IMAGE:$CI_COMMIT_REF_SLUG
  script:
    - docker login -u $CI_REGISTRY_USER -p $CI_REGISTRY_PASSWORD $CI_REGISTRY
    - docker build -t $IMAGE_TAG .
    - docker push $IMAGE_TAG
You can see more information about the code above on the following page on Gitlab documentation. Once you push these code, you should have a new container image available on Gitlab:
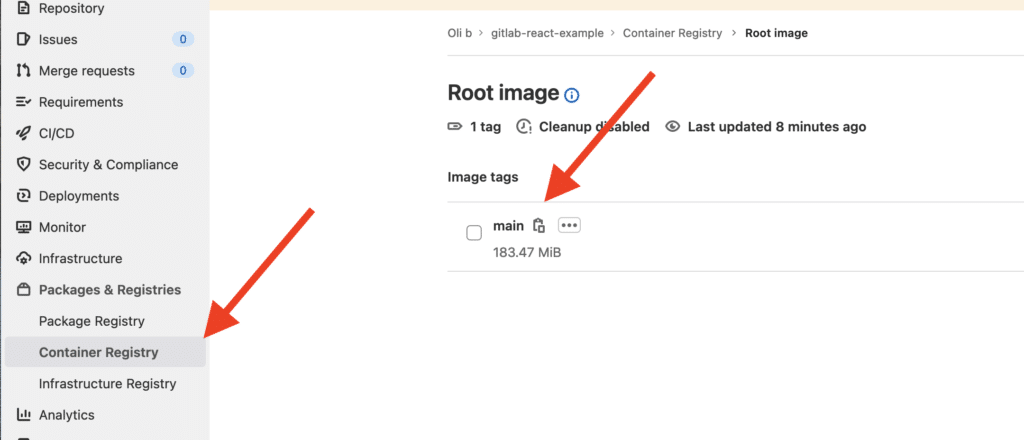
Perfect! In a few minutes, you automated your build on Gitlab
3. So when do we automate builds?
As we saw on this post, we cover the DevOps Concepts, how we used to automate build in the past and present. You will quickly notice, Development Teams can automate builds as soon as creating a new repository in Github and on Gitlab. The process is now simplified, it’s also free to implement and use, and speed of execution is really fast as it’s based on container technology.
To know more about automation and toolings, you can check this blog for more information.