Containerizing your application — packaging it and its dependencies into an executable container is a prerequisite for using Kubernetes.
The good news! Containerizing your application has advantages beyond just being able to deploy it into Kubernetes; it’s a valuable step in and of itself because you’re packaging up the application’s dependencies and can then run it anywhere without having to install those pesky dependencies on the host machine.

Containerizing your app, regardless of how you deploy it, means that your developers can start working on it locally using Docker. This allows them to get started on a new project with no setup beyond installing Docker.
Because the environments are completely isolated, it allows for easy context switching between the various applications that developers are working on. These characteristics make it a valuable way to improve developer productivity even if you don’t end up deploying your app to production with containers (though you probably will).
When you package your application into containers, all of your dependencies and configuration are captured by a standard Dockerfile configuration file, rather than a mixture of bash scripts, text-based instructions, human memory, and other non-standard configuration systems. It allows you to run multiple applications on a single host machine without having to worry about them interfering with each other, but with better performance and less overhead than full virtualization.
Building Docker Containers
Developer Setup – Docker is distributed as a developer tool for the majority of platforms. Docker Desktop is available for Windows and Mac, while Docker CE (Community Edition) is available for other platforms. Docker Desktop includes a few useful utilities, such as a local Kubernetes environment.
Building Application Images with Docker
The majority of container orchestration systems, such as Kubernetes, are focused on building and deploying distributed systems made up of application containers.
Dockerfiles
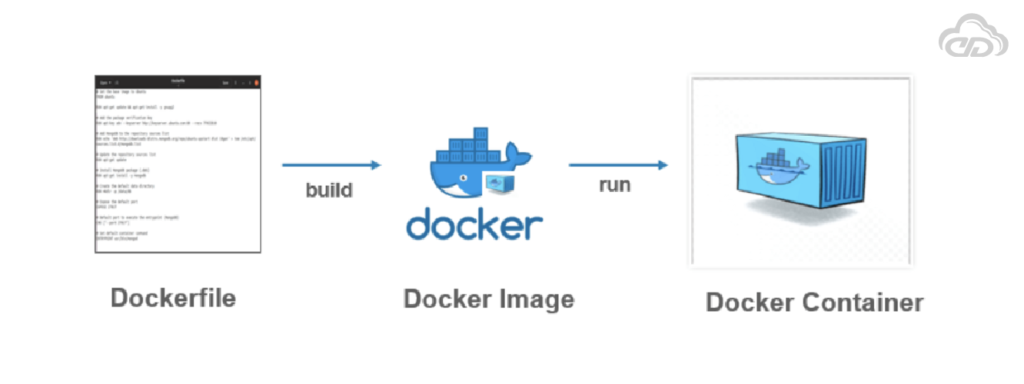
Dockerfiles can be used to automate the creation of Docker container images. First, let’s create a Node.js application image. This would be very similar for other dynamic languages, like Ruby or Python.
The simplest of npm/Node/Express apps has two files:
package.json (Example 1) and server.js (Example 2)
{
"name": "simple-node",
"version": "1.0.0",
"description": "A sample simple application for Kubernetes Up & Running",
"main": "server.js",
"scripts": {
"start": "node server.js" },
}
"author": ""
}
var express = require('express');
var app = express();
app.get('/', function (req, res) {
res.send('Hello World!');
});
app.listen(3000, function () {
console.log('Listening on port 3000!');
console.log(' http://localhost:3000');
});
To package this as a Docker image, we’ll need to add two more files: .dockerignore (Example 3) and the Dockerfile (Example 4).
The Dockerfile specifies how to build the container image, whereas .dockerignore specifies which files should be ignored when copying files into the image. The Docker website has a detailed description of the Dockerfile syntax.
node_modules# Start from a Node.js 16 (LTS) image
FROM node:16
# Specify the directory inside the image in which all commands will run
WORKDIR /usr/src/app
# Copy package files and install dependencies
COPY package*.json ./
RUN npm install
RUN npm install express
# Copy all of the app files into the image
COPY . .
# The default command to run when starting the container
CMD [ "npm", "start" ]
Run the following command to create the simple-node Docker image:
$ docker build -t simple-node .When you want to run this image, you can do it with the following command. You can navigate to http://localhost:3000 to access the program running in the container:
$ docker run --rm -p 3000:3000 simple-nodeOptimizing Image Sizes
When people start experimenting with container images, they run into a number of stumbling blocks that result in overly large images. The first thing to remember is that files removed by subsequent layers in the system are still present in the images; they are simply inaccessible. Consider the following example:
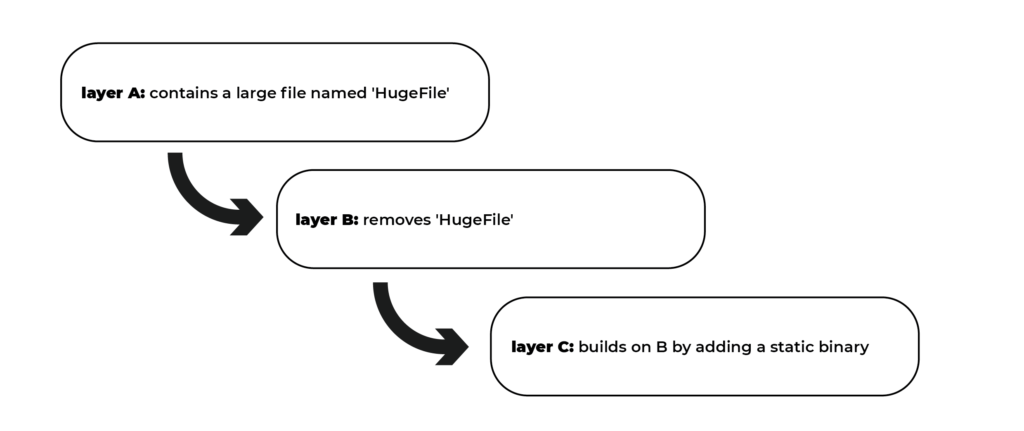
You may believe that HugeFile is no longer visible in this image. After all, once the image is run, it is no longer accessible. However, HugeFile is still present in layer A, which means that whenever you push or pull the image, HugeFile is still transmitted through the network, even if you can’t access it.
Another trap that people fall into is image caching and building. Remember that each layer is a separate delta from the layer beneath it. When you change a layer, it affects every layer that follows it. When you change the preceding layers, they must be rebuilt, repushed, and repulled before you can deploy your image to development.
Consider the following images to gain a better understanding:

Versus

It appears obvious that both of these images will behave similarly, and they do so the first time they are pulled. Consider what happens when server.js is updated. In one case, only the change needs to be pulled or pushed, whereas in the other, both server.js and the layer providing the node package need to be pulled and pushed because the node layer is dependent on the server.js layer.
To optimise the image size for pushing and pulling, you should order your layers from least likely to change to most likely to change. As a result, in Example 4, we first copy the package*.json files and install dependencies before copying the rest of the programme files.
A developer will update and change programme files much more frequently than dependencies.
Importance of Image Security

When it comes to security, there are no shortcuts. It is critical to follow best practises for application packaging and distribution when creating images that will eventually run in a production Kubernetes cluster. Avoid embedding passwords in containers, for example, and this includes not just the final layer, but any layer in the image.
One perplexing consequence of container layers is that deleting a file in one layer does not remove it from subsequent layers. It still takes up space and is accessible to anyone with the right tools—an astute attacker can simply create an image consisting of the layers containing the password.
It is never a good idea to mix secrets and images. If you do, you will be hacked and bring shame to your entire company or department.
We all want to appear on television at some point in our lives, but there are more efficient ways to do so.
Furthermore, because container images are designed to run a single application, it is best practice to keep the number of files contained within the container image to a minimum. Each additional library in an image introduces a new vector for vulnerabilities to manifest in your application.
It is possible to create extremely small images with a minimal set of dependencies, depending on the language. This more limited set ensures that your image is not vulnerable to exploits in libraries that it will never use.